Bawn.Pdf.Mvc has a mascot: a hand-drawn mouse hugging a wedge of cheese, because the mouse likes the document. Bawn.Nuget.Server had a 📦 emoji and no favicon. The brief was to give the NuGet server the same look-and-feel and the same logo methodology — except the animal should be a raccoon, because raccoons love digging through packages for goodies.
Landed in 32fb519 on Bawn.Nuget.Server@master.
What We Worked On
The source was a hand-drawn watercolour raccoon: bandit mask, ringed tail, sitting on its haunches and clutching a red apple, painted on textured cold-press paper.
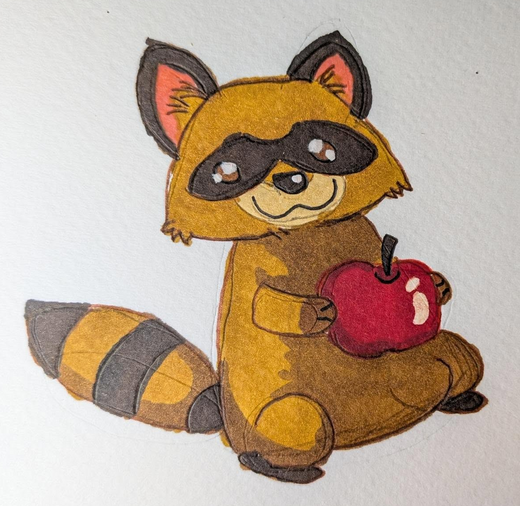
The Bawn.Pdf.Mvc methodology is two moves: cut the subject off its paper into a transparent PNG master, then render the web asset set from that master — favicon.ico, a 96px mark, a 180px apple-touch-icon, and a 600px logo. Same two moves here, just a different animal and a paper that fought back.
The Bandit Gets a Clean Cutout
The mouse was lifted off its background with the classic ImageMagick recipe: flood-fill the four corners to transparent, trim, square. I tried the exact same recipe first.
ImageMagick 6 sharp edge: the alpha-channel flood-fill primitive is matte, not alpha. The IM7 alpha keyword errors out under IM6 with “non-conforming drawing primitive definition” — my very first run silently did nothing because of it.
On the mouse’s cleaner background this is enough. On watercolour paper it is not: 18% fuzz from the corners cleared the bulk of the page but left a pale halo of paper texture clinging to the silhouette, and a stray fleck of ink in the top-right corner survived as its own little island. On the dark sidebar the halo glowed. The bandit looked like he’d been photocopied.
Stop asking “is this pixel pale?” and start asking “is this pixel pale and can it walk to the edge of the image without crossing a line?” Background becomes paper-coloured pixels that are connected to the border. That one rule protects the interior near-whites (eyes, apple highlight, cream muzzle) for free, because the dark linework walls them off from the edge.
So I swapped the flat flood-fill for a border-connected background removal in NumPy + Pillow + SciPy. After labelling the background, keep only the largest foreground blob — which evicts the stray fleck and 600-odd other paper specks in a single pass.
That run reported fg blobs=665 kept largest area=557510 dropped=664 — the raccoon, and 664 evicted specks. A 1px erosion pulls the edge in past the paper fringe; a 0.6px Gaussian on the alpha gives a clean anti-aliased rim. Composited on the sidebar’s dark indigo: no halo, no fleck.
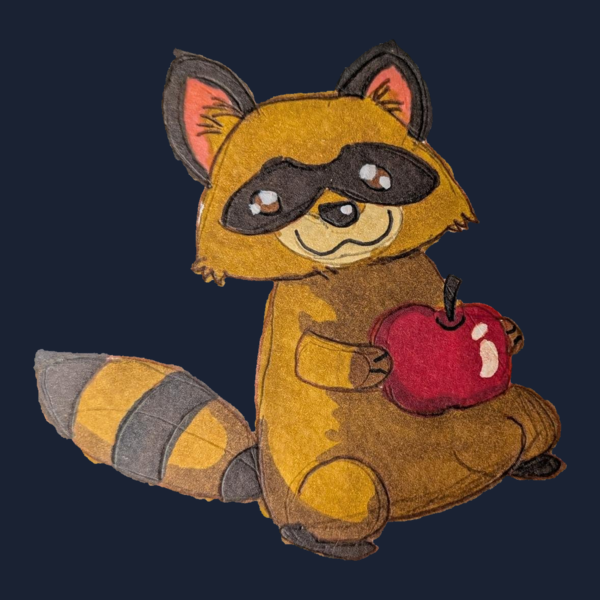
From Master to Favicon
With a clean master.png, the asset set is pure ImageMagick — the same sizes the mouse ships.
By default ImageMagick stamps date:create / date:modify chunks into every PNG, so two runs of an identical pipeline produce different bytes. -strip drops them. I re-ran the generator into a scratch dir and cmp’d every asset against the committed copy: identical, all four.
The tiny favicon sizes get a touch of -unsharp so the bandit mask still reads at 16px. Enlarged, the 32px icon keeps its masked face, ringed tail, and red apple.
Wiring It Into Blazor
Bawn.Nuget.Server is Blazor, not MVC, and it has a theme system: all global CSS lives in App.razor and colours come from --theme-* custom properties. So the branding had to ride the theme, not hardcode the Mvc palette. Three small edits.
The <head> gained the icon links (base-relative, so they respect the server’s PathBase):
.sidebar-brand was restyled from a bare text line into the Mvc brand pattern — logo, then a wordmark with an accent-coloured suffix and a small tagline:
And the markup in MainLayout.razor swapped the emoji for the raccoon and the Bawn.Pdf → Bawn.Nuget wordmark, with the tagline doing the joke:
dotnet build stayed green (0 warnings / 0 errors) before and after.
A Palette, Sampled From the Bandit
One last touch, and a self-referential one: the colours you are reading this in were sampled from the raccoon. A short k-means over the opaque pixels of the cutout — paper excluded, so only the bandit votes — surrenders his palette by population.
Seven clusters fall out, deterministic to the seed:
The espresso of his mask became the header and every section rule; the sienna of his fur, the subheadings and the rail down the left of these code blocks; the cream, the eyebrow and the metadata. And the one vivid non-brown note in the whole animal — the apple he will not let go of — became the accent: this page’s links, the line under each heading, even the border around that swatch row. He is, quite literally, the colour scheme.
What Went Well
The methodology transferred whole. Cut-to-transparent → size set → wire into the brand and the <head>. The only thing that changed between the mouse and the raccoon was the cutout technique.
Theme-aware, not theme-fighting. The accent suffix uses var(--theme-accent) and the tagline a translucent white, so the wordmark looks right under every theme the server ships rather than only the one I happened to test.
Reproducible bytes. With -strip, the asset pipeline is deterministic; the committed images are exactly what the scripts emit — which is also what lets this very devblog embed those scripts verbatim by a deterministic builder.
What Didn’t Go Well
The naive flood-fill lost to the paper. Cold-press texture meant a flat corner fill left a halo and a surviving fleck. The flat fill was a tempting dead end precisely because it worked for the mouse.
PNG timestamps broke reproducibility until -strip went in — invisible until they made the cmp fail.
Concurrency. Another session was committing to the same repo; HEAD moved twice under me. I kept my commit to just the six branding files, rebased onto their hosting work, and pushed — no clobber.
Not verified in a browser by me. The asset images I checked by eye; the build compiles and the referenced paths exist in wwwroot, but the live Blazor render (it needs a database) is the user’s to confirm.
Takeaways
-
1For textured-paper cutouts, connectivity beats thresholding.
“Background = paper-coloured and reachable from the edge” protects interior highlights that a flat colour key would punch holes in.
-
2Keep the largest component.
One line of
scipy.ndimage.labelturned 665 blobs into 1 and made the speck-removal problem disappear. -
3
-stripif you want reproducible image bytes.Metadata timestamps are invisible until they make your
cmpfail. -
4Let concurrent sessions own their commits.
Stage by file, rebase onto their pushes, and your branding lands without stepping on their hosting work.
The Watercolor
If I painted this session, I’d paint it on the same cold-press paper the raccoon came in on, because the paper was the antagonist — and you have to give the antagonist the good stock.
The composition is a diptych. On the left panel, the bandit as he arrived: warm raw sienna and burnt umber, that cheeky black mask in near-dry payne’s grey, the apple a single confident cadmium-red wash. But all around him the page is busy — I’d let the wash bleed and granulate, leave the brush-hairs in, let a faint ochre haze hang at his edges like the halo the flood-fill couldn’t kill. It’s pretty, and it’s wrong, and that’s the point of the left panel.
The right panel is the same raccoon lifted clean onto deep indigo — the sidebar. Here the brushwork goes quiet and deliberate: a crisp wet edge all the way around, no fringe, the mask and the ringed tail reading instantly even shrunk to a thumbnail. The transition between the panels is the real subject: the moment the work stopped being colour and started being connectivity. That reframing is the cerulean stroke of the painting — small, certain, and the thing that made everything after it easy.
In the bottom corner, tiny, almost a signature: the 16-pixel favicon. Three brush-dabs of brown, a fleck of red, and somehow still unmistakably a raccoon with an apple, digging through the packages for goodies.